


This article will set up a CI/CD pipeline for our Terraform source code ( refer post ) to spin AWS EC2 instance. The aim is to automate our development workflow by building the DevOps pipeline using GitHub Actions.
GitHub Actions
Before we proceed further let's understand GitHub Actions. It is a platform to automate tasks within the software development lifecycle. It's an event-driven framework, which means we can carry series of commands for a given event or can be scheduled for one-off or repetitive tasks. (e.g. Execute a Test Suite on Pull Request creation, Adding labels to issues, Lint checks, etc.)
It is fully integrated into GitHub. It also gives added advantage to store the source code and the CI/CD pipeline execution on the same platform. CI/CD pipeline is one of the automation workflow offerings to streamline the overall software development and delivery process.
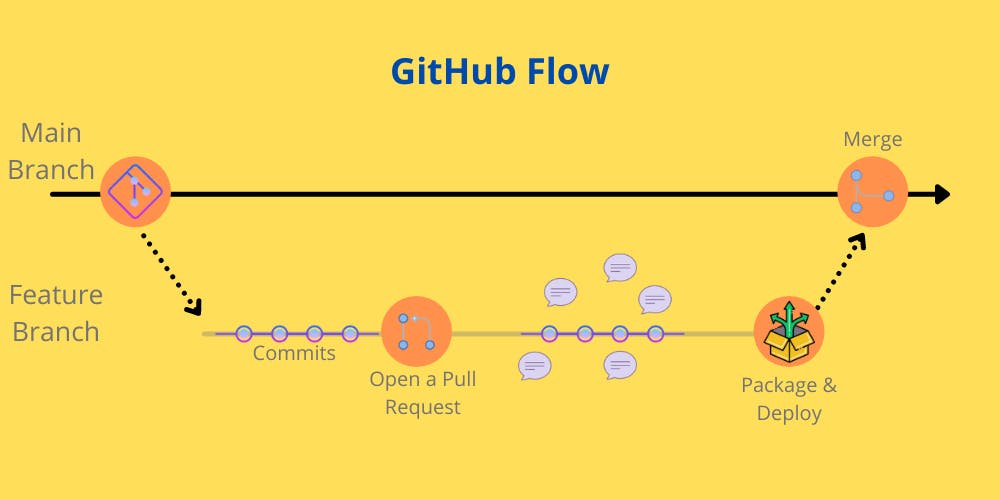 We can apply GitHub Actions, essentially to any stage of GitHub flow.
- Configure CI/CD
- Execute a specific automated task when an issue is opened
- Generate automate reminders for Pull Requests based on owners or reviewers
Workflow Strategy
Github allows us to create workflows in the following ways:
- Create a YAML config (file name - *.yml or *.yaml) within the GitHub repository.
- Create the workflow via Actions Tab on Github Repository's Web Interface.
 Clicking on
 Set up this workflow will pre-fill the required Terraform workflow.
For this article, we will focus on the first approach.
Prerequisites
- Fork the Github Repository - tf-aws-ec2
- AWS User with Programmatic access
- AWS Access Key ID
- AWS Secret Access Key
- AWS IAM Privileges to create EC2 Instance
Recommended to create a feature branch and checkout this branch
git checkout -b github-actions-demo
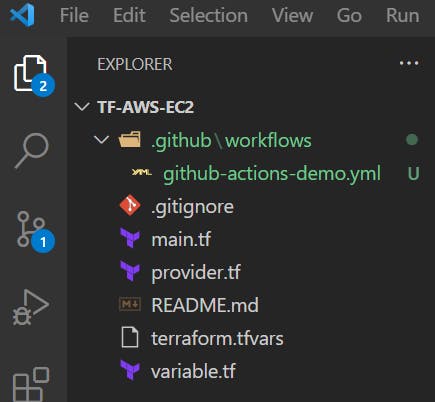
Create a new file in the .github/workflows directory named github-actions-demo.yml
Now, let's start writing the configuration in the yaml file.
name - The name of your workflow. GitHub displays the names of your workflows on your repository's actions page - "Terraform Build Demo"
name: 'Terraform Build Demo'
on - (Required) The name of the GitHub event that triggers the workflow. We have configured to trigger the workflow on Pull Request and Push events to the main branch.
Pull Requestevent- Triggered when the Pull request will be raised for the new feature branchPushevent - Triggered when the Pull Request is merged into themainbranch.
on:
  push:
    branches:
      - "main"
  pull_request:
    branches:
      - "main"
jobs - A workflow run is made up of one or more jobs. These jobs can run in parallel or sequentially. Each job executes in a runner environment specified by runs-on.
job name - The name of the job displayed on GitHub.
runs-on - (Required) Determines the type of machine to run the job on. The machine can be either a GitHub-hosted runner or a self-hosted runner.
Available GitHub-hosted runner types are: windows-latest / windows-2019 / windows-2016 / ubuntu-latest / ubuntu-20.04 etc.
environment - The environment that the job references. All environment protection rules must pass before a job referencing the environment is sent to a runner.
jobs:
  terraform:
    name: 'TF GitHub Actions Demo'
    runs-on: ubuntu-latest
    environment: production
defaults.run - Helps define default shell and working-directory options for all run steps in a workflow.
    defaults:
      run:
        shell: bash
steps - Sequence of tasks called steps within a Job. They can execute commands, set up tasks, or run actions in your repository, a public repository, or action published in a Docker registry.
The first step is to check out the source code in the runner environment.
Checkout V2- This action checks out your repository under $GITHUB_WORKSPACE, so your workflow can access it.
    - name: Checkout
      uses: actions/checkout@v2
The second step is to set up Terraform CLI in the runner environment.
setup-terraform - is a JavaScript action that sets up Terraform CLI
    - name: Setup Terraform
      uses: hashicorp/setup-terraform@v1
      with:
        terraform_version: 1.0.0
To ensure access to the AWS Cloud environment we need to configure AWS_ACCESS_KEY_ID and AWS_SECRET_ACCESS_KEY in the runner environment. The values for these variables will be configured as GitHub Secrets in the below section.
Configure AWS Credentials - This action configures AWS credential and region environment variables for use in other GitHub Actions.
    - name: Configure AWS Credentials
      uses: aws-actions/configure-aws-credentials@v1
      with:
        aws-access-key-id: ${{ secrets.AWS_ACCESS_KEY_ID }}
        aws-secret-access-key: ${{ secrets.AWS_SECRET_ACCESS_KEY }}
        # aws-session-token: ${{ secrets.AWS_SESSION_TOKEN }}
        # if you have/need it
        aws-region: us-east-1
The runner environment is now configured. We can now configure Terraform commands.
run - Runs command-line programs using the operating system's shell.
Terraform Init initializes the configuration used in the GitHub action workflow.
- name: Terraform Init
  id: init
  run: terraform init
Terraform Format checks whether the configuration has been properly formatted. It will throw an error if the configuration isn't properly formatted.
    - name: Terraform Format
      id: fmt
      run: terraform fmt -check
      env:
        TF_ACTION_WORKING_DIR: .
      continue-on-error: true
Terraform Validate validates the configuration used in the GitHub action workflow.
- name: Terraform Validate
  id: validate
  run: terraform validate -no-color
Terraform Plan generates a Terraform plan.
- This step only runs on pull requests. The PR generates a plan. When the PR is merged, that plan will be applied.
- This step will continue even when it errors. This allows the next step to display the plan error message even if this step fails
Terraform Plan Status returns whether a plan was successfully generated or not.
- name: Terraform Plan Status
  if: steps.plan.outcome == 'failure'
  run: exit 1
Terraform Apply applies the configuration. This step will only run when a commit is pushed to main
- name: Terraform Apply
  if: github.ref == 'refs/heads/main' && github.event_name == 'push'
  run: terraform apply -auto-approve
The complete file github-actions-demo.yml will look as below.
name: 'Terraform Build Demo'

on:
  push:
    branches:
      - "main"
  pull_request:
    branches:
      - "main"

jobs:
  terraform:
    name: 'TF GitHub Actions Demo'
    runs-on: ubuntu-latest
    environment: production

    defaults:
      run:
        shell: bash

    steps:
    - name: Checkout
      uses: actions/checkout@v2

    - name: Setup Terraform
      uses: hashicorp/setup-terraform@v1
      with:
        terraform_version: 1.0.0

    - name: Configure AWS Credentials
      uses: aws-actions/configure-aws-credentials@v1
      with:
        aws-access-key-id: ${{ secrets.AWS_ACCESS_KEY_ID }}
        aws-secret-access-key: ${{ secrets.AWS_SECRET_ACCESS_KEY }}
        # aws-session-token: ${{ secrets.AWS_SESSION_TOKEN }}
        # if you have/need it
        aws-region: us-east-1

    - name: Terraform Init
      id: init
      run: terraform init

    - name: Terraform Format
      id: fmt
      run: terraform fmt -check
      env:
        TF_ACTION_WORKING_DIR: .
      continue-on-error: true

    - name: Terraform Validate
      id: validate
      run: terraform validate -no-color

    - name: Terraform Plan
      id: plan
      if: github.event_name == 'pull_request'
      run: terraform plan -no-color
      continue-on-error: true

    - name: Terraform Plan Status
      if: steps.plan.outcome == 'failure'
      run: exit 1

    - name: Terraform Apply
      if: github.ref == 'refs/heads/main' && github.event_name == 'push'
      run: terraform apply -auto-approve
We need to also configure AWS credentials such that they are accessible to the GitHub Actions YAML script. The best way is to configure them as GitHub Secrets against the repository.
Navigate to your GitHub repository on Web Console --> Settings --> Secrets (Left Nav Bar) --> Click New Repository Secret
Configure values for the following variables as GitHub Secrets:
- AWS_ACCESS_KEY_ID
- AWS_SECRET_ACCESS_KEY
PERSONAL_ACCESS_TOKEN
For Personal Access Token (PAT) generation, refer to the following GitHub docs.

Raise Pull Request for the new branch via Web Console. Refer following GitHub docs for more information.
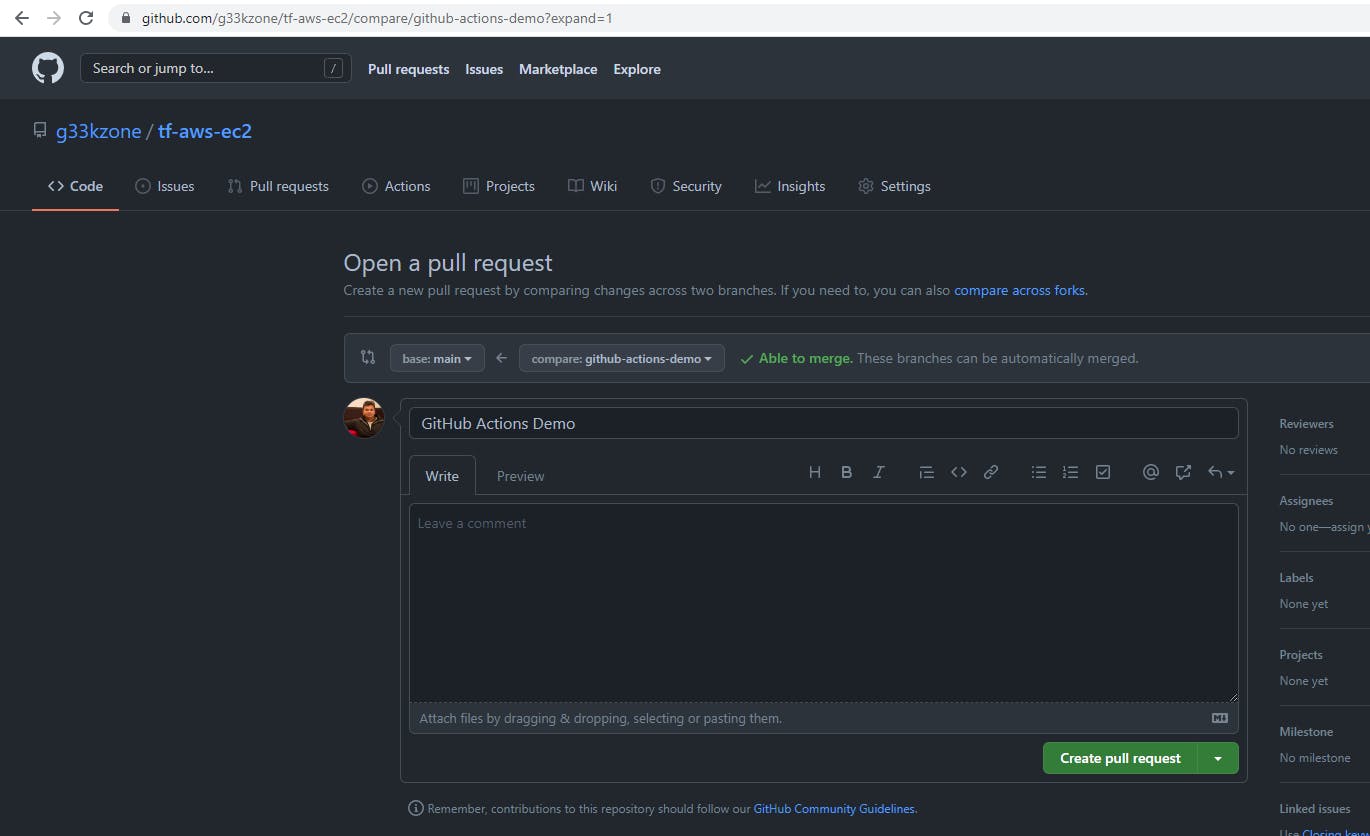
Once the PR is raised, the GitHub Actions Job is triggered for the Pull Request event.
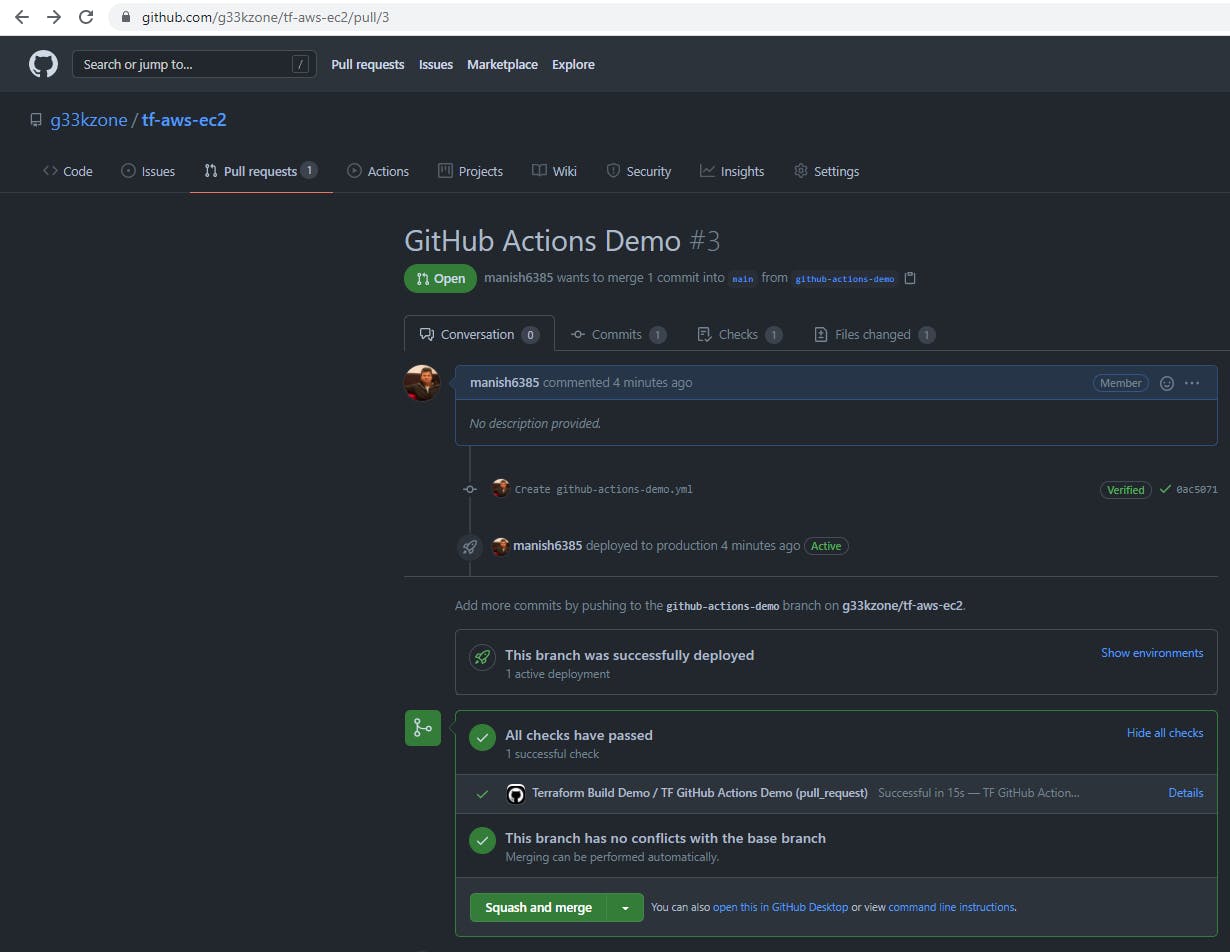
On Clicking the Details link, we can see all the executed Steps and their corresponding logs.
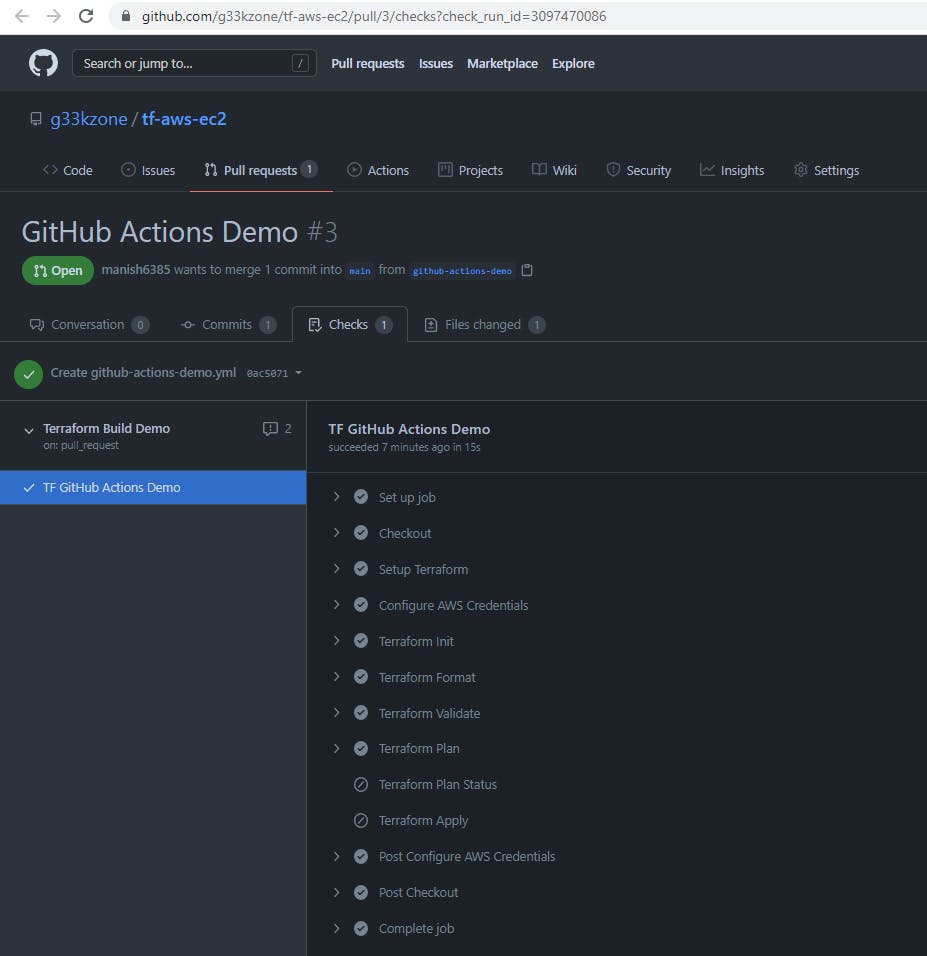
Observations:
Terraform Planrun was successful, hence theTerraform Plan Statusrun execution was skipped due to thefailurefilter condition.- The
Terraform Applyrun execution was also skipped - configured to be executed on thePUSHevent.
Merge Pull Requests (PUSH event)
On merging the Pull request into the main branch. The configured GitHub actions workflow will be triggered again for the PUSH event.
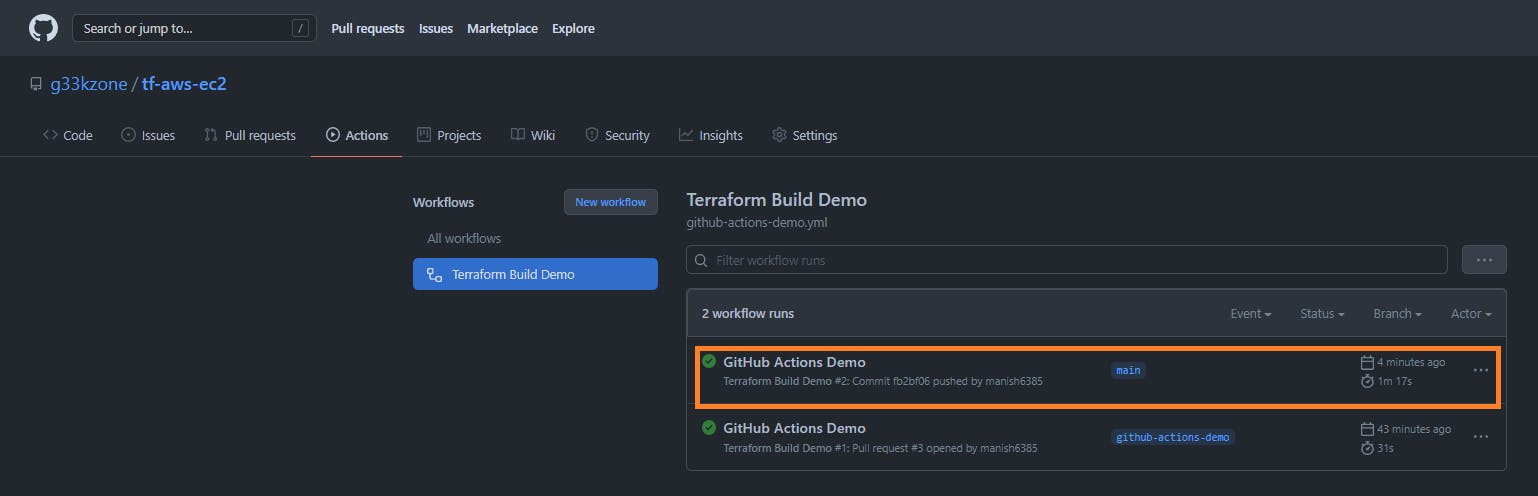 Click on the second workflow run of
 GitHub Actions Demo.
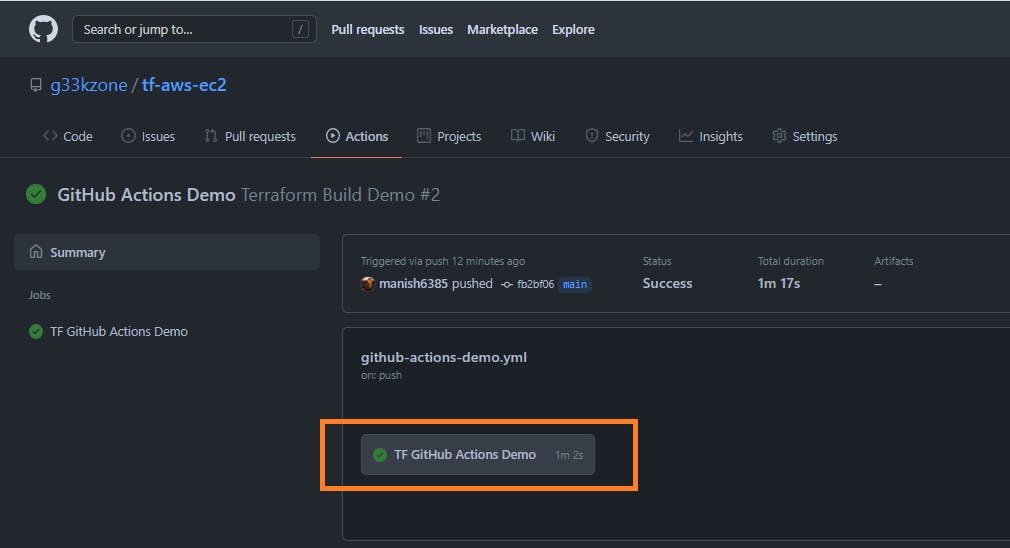 Click on
 TF GitHub Actions Demo.
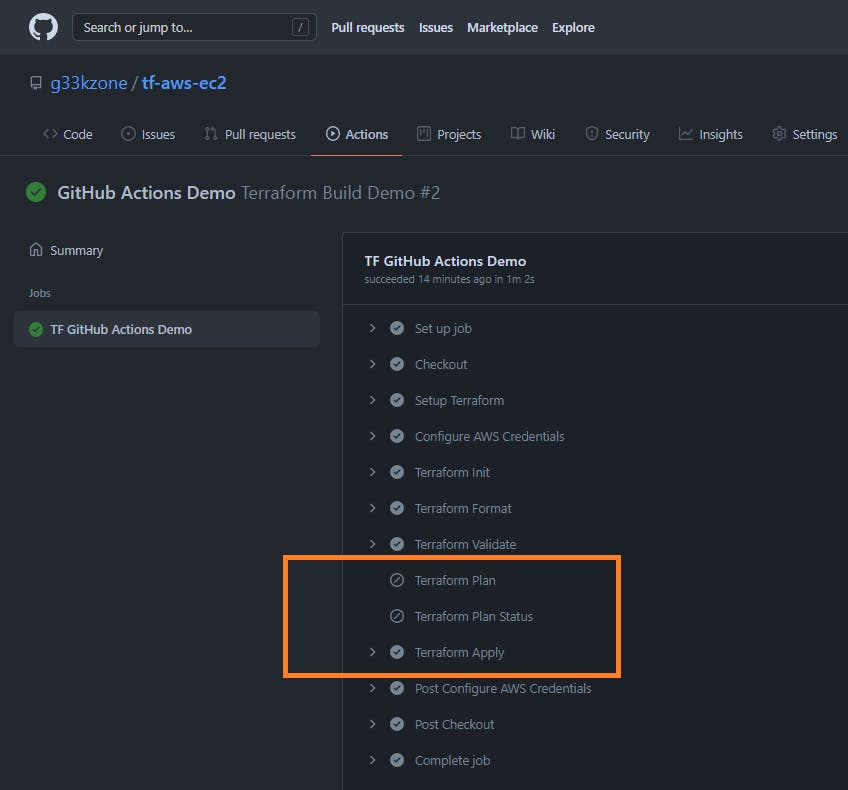
Observations:
Terraform Planrun was skipped as it will be triggered only onPULL Request.- The
Terraform Applyrun was successfully executed - configured to be executed on thePUSHevent. As a result, an AWS EC2 instance was created.
 The existing setup is now capable of handling any changes (new/updates). The Terraform scripts will be automatically deployed to AWS Cloud once source code is merged into the
 main branch as demonstrated above.
Destroy resources
Remember to destroy the resources (i.e AWS EC2 instance) you created for this tutorial to avoid any costs.
Refer to the GitHub Repo for the source code demonstrated in the above post.